

Schedule
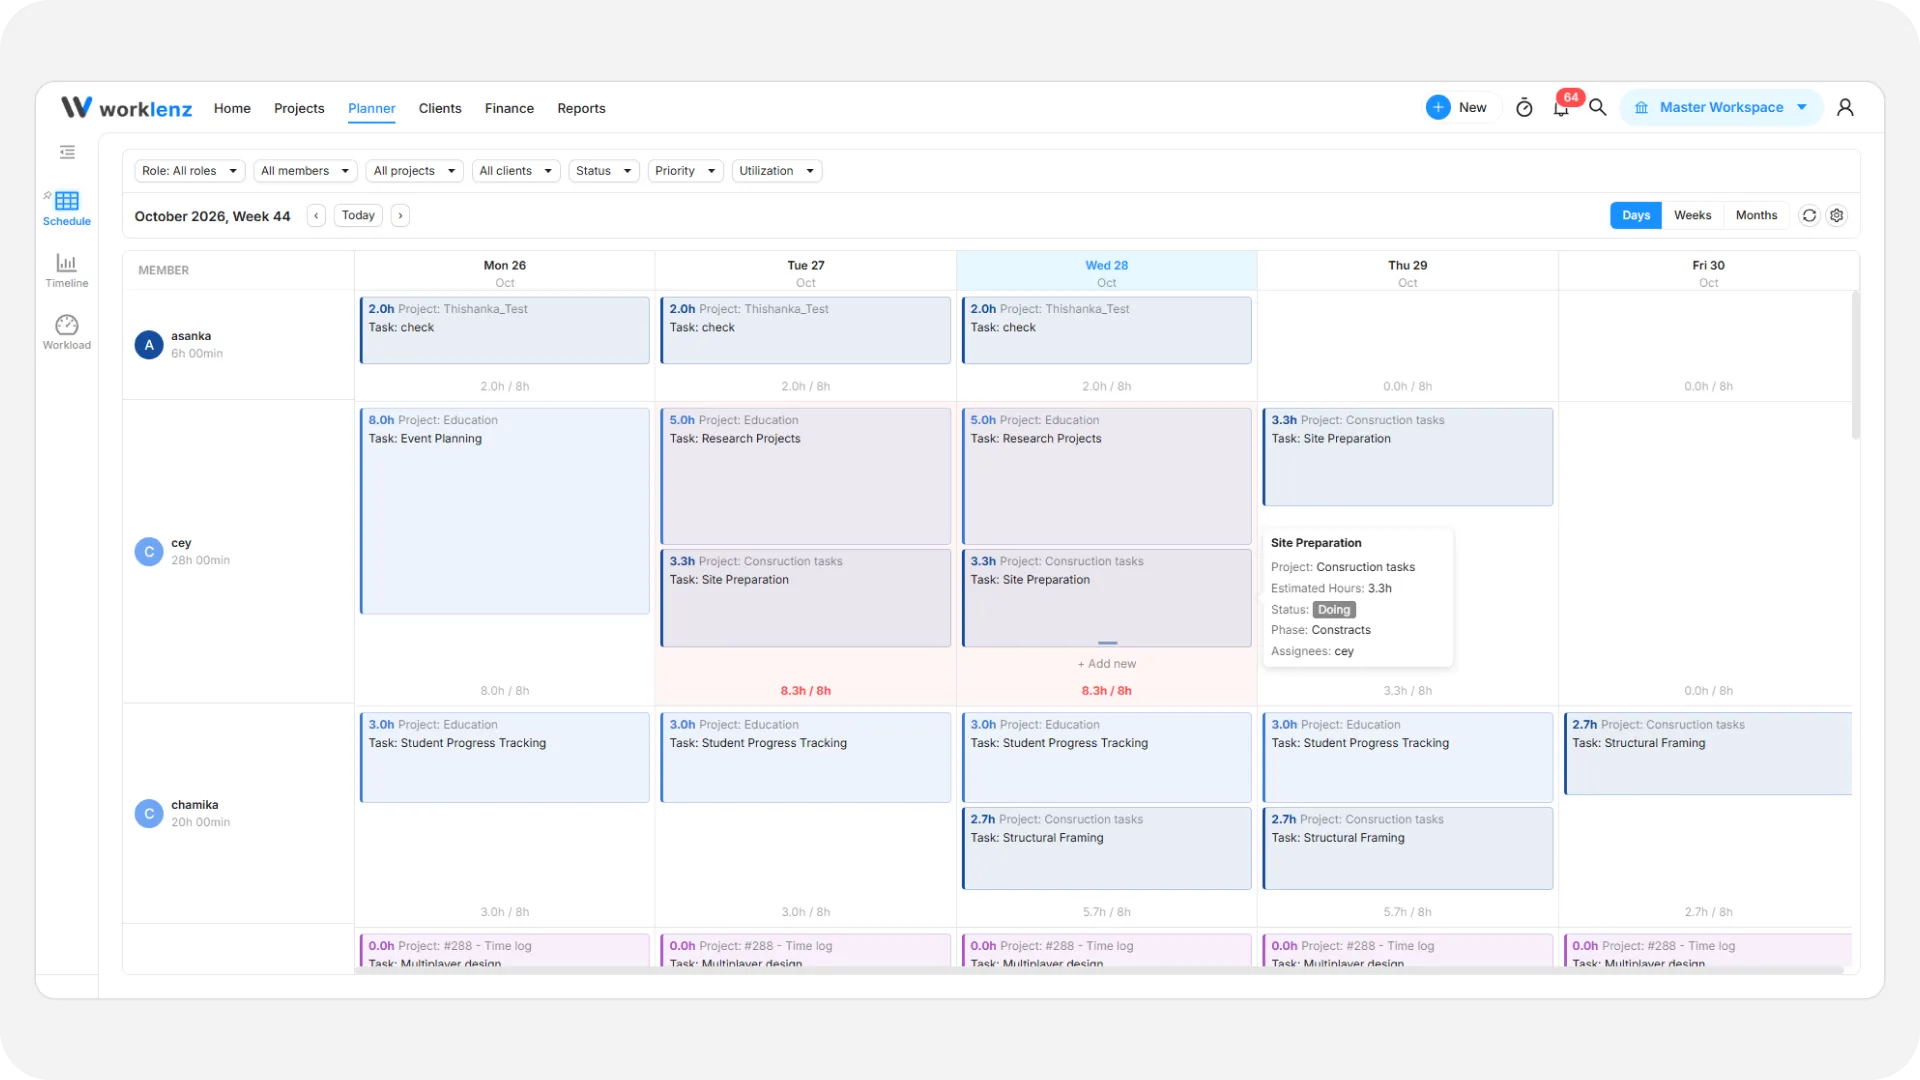
Schedule lays every team member out as a row and dates as columns, with each person’s assigned tasks shown as chips on the days they’re scheduled to work on them. It’s part of Planner, alongside Timeline and Workload.
How to Access
- Click Planner in the top navigation bar.
- In the left-hand rail, select Schedule.
Filters
Each filter below is multi-select, and all of them combine together:
- Role: Narrow the grid down to members with a specific job title.
- Members: Show only specific team members.
- Projects / Clients: Show only tasks that belong to specific projects, or to projects under a specific client.
- Project Status / Priority: Show only tasks whose project is at a given status or priority.
- Utilization: Show only members in a given capacity band - Available (under 80%), Near capacity (80-100%), or Over-allocated (over 100%).
Navigation and display
- Date navigation: Use the ‹ / › arrows to move the visible range, or Today to jump back to the current week.
- Zoom: Switch the grid’s density between Days, Weeks, and Months.
- Refresh: Reloads the grid’s members, tasks, and capacity data.
- Settings (gear icon): Opens the shared Planner settings drawer - working days, working hours per day, show/hide weekends, and the default estimate used for tasks with no estimate of their own.
The grid
- Member column: Each row shows the member’s avatar, name, and their total scheduled hours across the visible range (for example,
6h 30min). - Task chips: Each chip shows the task’s name under the day it’s scheduled on. A task’s estimate is split evenly across the working days between its start and due date, so a 3-day task shows a third of its estimate on each working day. Subtasks appear as their own chip, prefixed with
↳, with their own independent estimate. - Capacity warnings: Hovering a chip shows the task’s project, estimated hours for that day, status, phase, and assignees. If the hours scheduled on a day exceed that member’s working hours, the tooltip flags it as exceeding their working hours.
- Time off and holidays: Days a member has time off or a holiday applied show a badge and reduce their available hours for that day; a full day off blocks new tasks from being added to that cell.
Creating and assigning work
Click an empty (or occupied) day cell to open Add Task, where you can either:
- New Task - create a brand-new task, pre-filled with the member and date you clicked.
- From Unassigned - pick an existing task that has no assignee yet, scoped to a project you choose, and schedule it to that member and date.
Drag, drop, and resize
- Move a task: Drag a chip to a different day in the same row to change its due date, or to a different member’s row to reassign it. Dragging to a different day and a different member does both at once.
- Resize the estimate: Drag the handle on a chip’s bottom edge up or down to change its total estimated hours, in 0.5-hour steps (Days and Weeks zoom only).
- Resize the date range: Drag the handle on a chip’s left or right edge to change its start or due date; the estimate is automatically re-split across the new range (Days and Weeks zoom only).
All of these changes sync live to everyone else viewing Schedule, Timeline, or Workload.