

Add a client to the Client Portal
Adding a client is a three-step wizard: pick a method, enter the person’s details, then choose projects and decide whether to send the invitation now. When you finish, Worklenz links the projects, switches the portal on for them and records the invitation in the audit log.
At a glance
| What it is | The Add New wizard in the Clients area |
| Where to find it | Client Portal > Clients > Add New (or Invite user inside a client) |
| Who can use it | Workspace Owners and Admins |
| Plan | Pro and Business. See plans and permissions |
Choose how to add the client
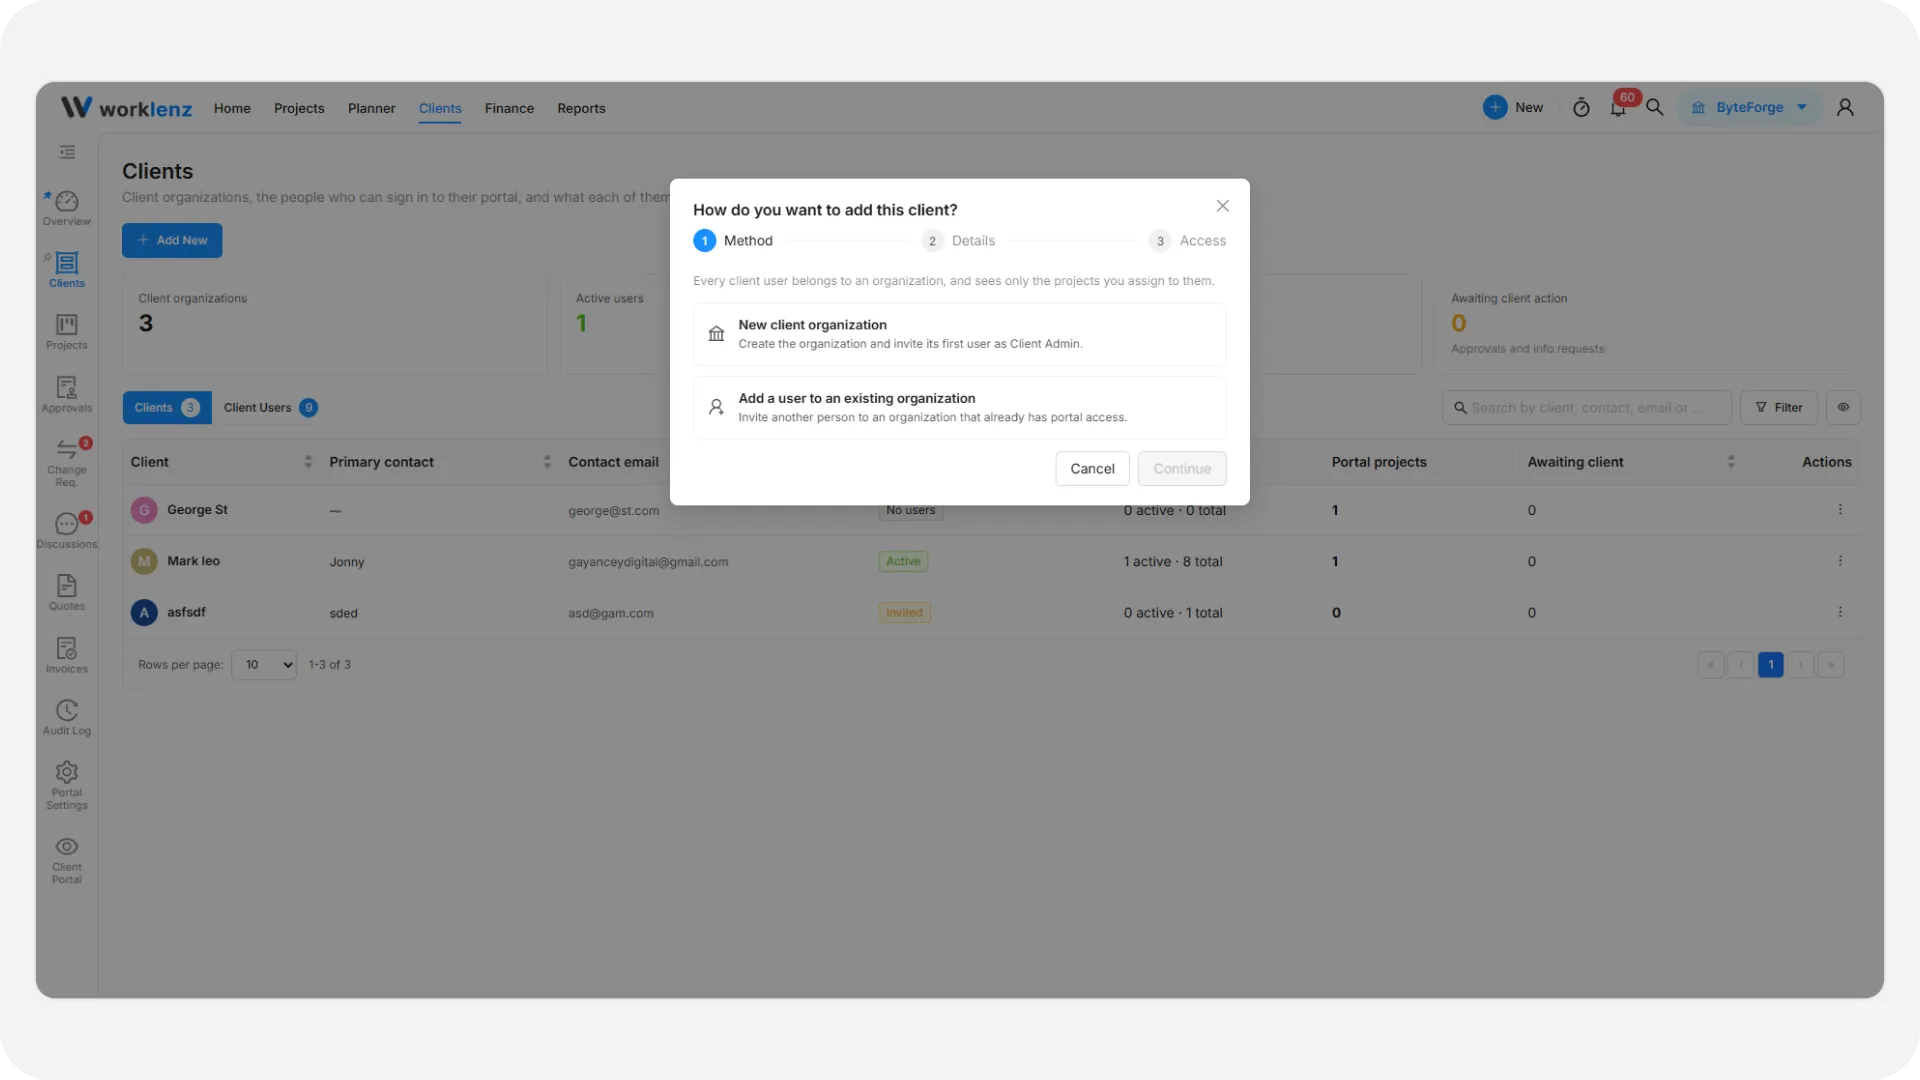
The first step asks “How do you want to add this client?”
- New client organization creates the organization and invites its first person, who becomes a Client Admin.
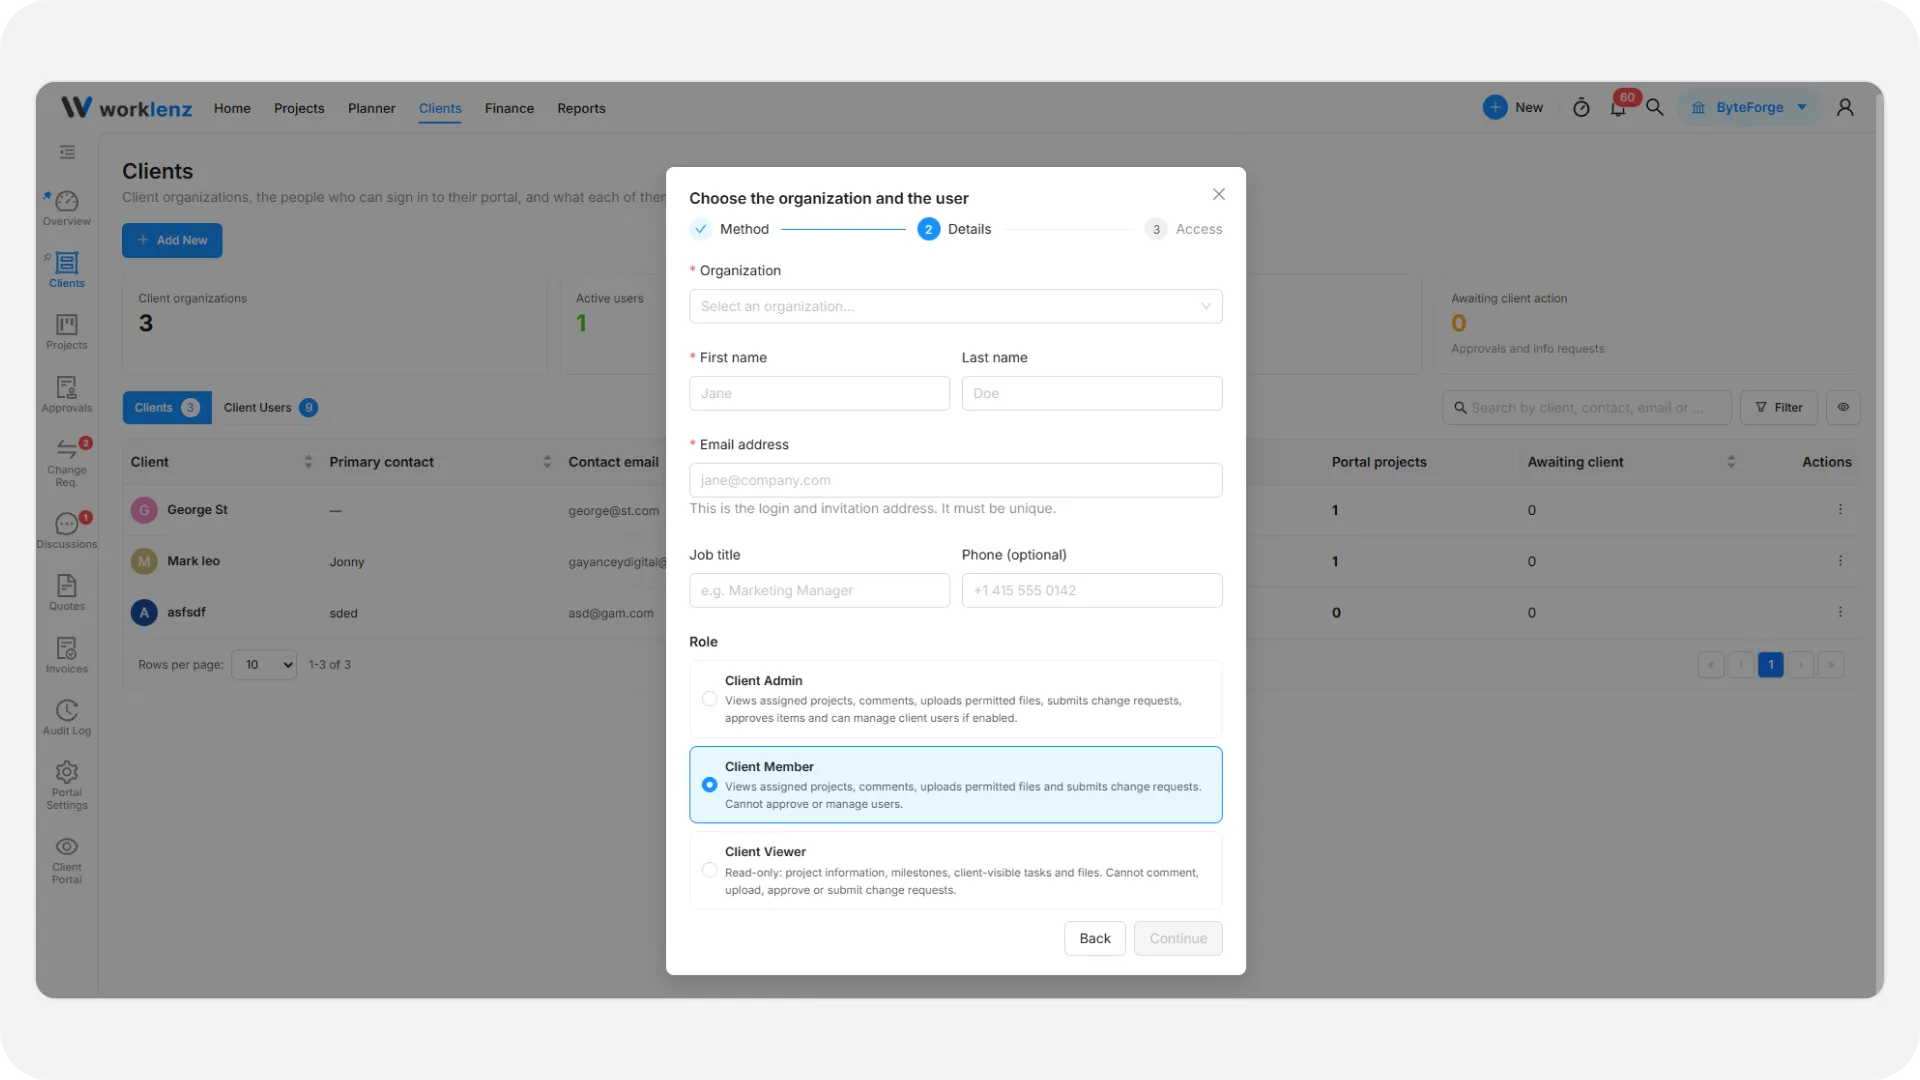
- Add a user to an existing organization invites another person to an organization that already has portal access. You pick their role: Admin, Member or Viewer. Member is the default.
Use the second option when a client wants a colleague added. You can also open a client and choose Invite user to start with that organization filled in.
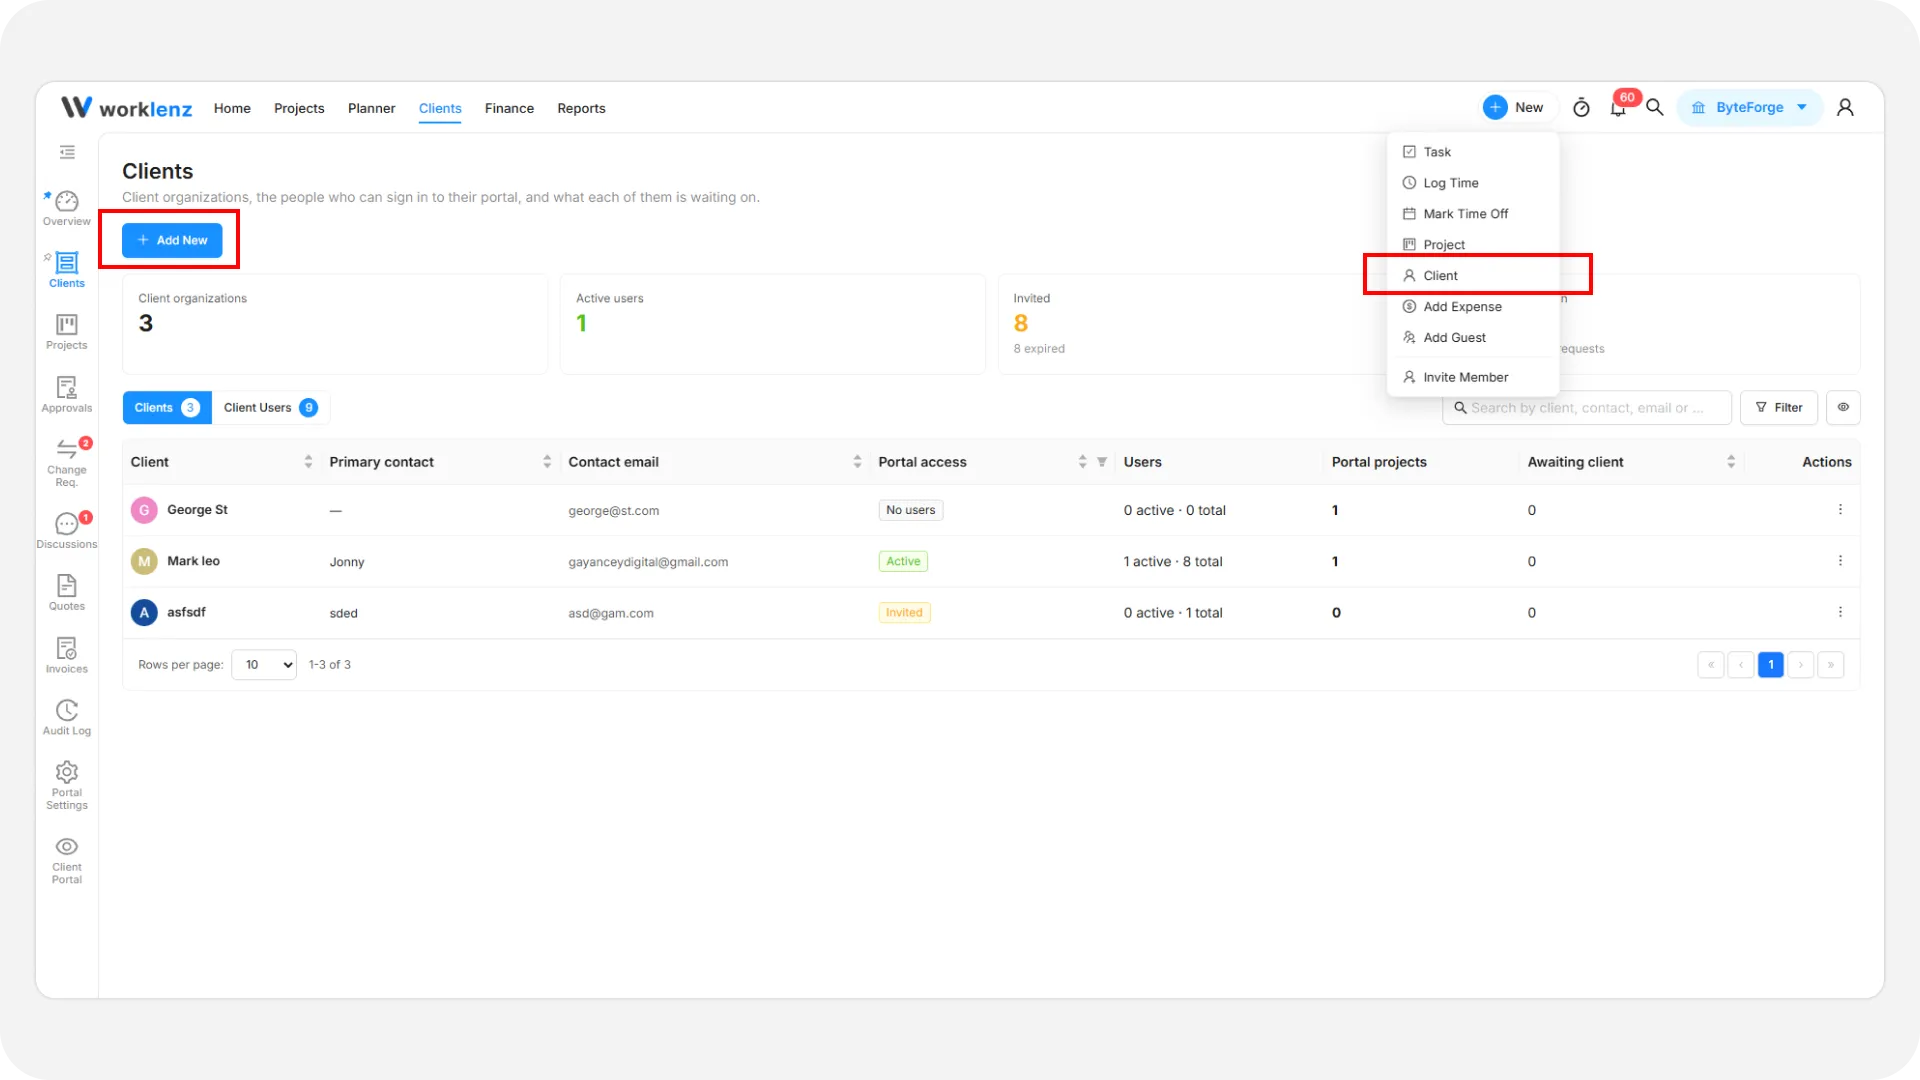
How to add a new client organization
- Open Clients and select Add New.
- Choose New client organization, then Continue.
- Enter the organization name.
- Enter the person’s First name and Email address. Last name, phone and job title are optional.
- Select Continue.
- Pick the projects this client should see. Projects without a client are linked to the new organization. Any project with the portal off shows the tag “Portal off, will be switched on”.
- Leave Send the invitation now ticked to email the invitation, or untick it to send later.
- Select Send invitation (or Add user if you unticked the box).
What the form checks
- First name is required.
- The email must be valid and unique. It is the sign-in and invitation address.
- A new organization needs a name. Names can be up to 60 characters, and a duplicate name is refused.
- A new organization can only be linked to projects that do not have a client yet. An existing organization can only be linked to its own projects.
What happens when you finish
You get one or more of these messages:
| Message | Meaning |
|---|---|
| Invitation sent to {email}. | The email went out. |
| {name} was added as {role}. No invitation was sent yet. | You unticked the checkbox. Send the link later from the Users list. |
| {name} was saved, but the invitation email could not be sent. Share the link instead. | The person exists but the email failed. See below. |
| Client Portal switched on for {count} project(s). | The projects you picked are now live for assigned users. |
The person receives an email titled “Welcome to your Client Portal” with your team’s name. The link works for 7 days. Opening it sends a 6-digit code to their email, and they enter it to sign in. There is no password. See client sign-in and security.
If the email fails or the link expires
Open Clients, switch to Client Users, find the person and use Create sign-in link to copy a link you can send yourself by chat or email. Or choose Resend invitation. Each new link replaces the older one. More in manage client users.
Best practices
- Untick Send the invitation now if the client is not ready yet, because the invitation link is only valid for 7 days.
- Double-check the email address before you finish, because it is the sign-in address and it locks once the person has signed in.
- Choose Add a user to an existing organization for a colleague of an existing client, because a second New client organization with the same name is refused.
- Tell the client to expect an empty portal if you add them with no projects ticked, because they see nothing until you assign work.
- Use Create sign-in link if the email fails, because each new link replaces the older one and you can send it by chat.