

Create a software project
To create a software project, open the New project window, set Project type to Software, name the project and create it. Worklenz sets up software statuses, a first sprint and the Backlog tab for you. The project type cannot be changed later, so check it before you confirm.
At a glance
| What it is | A blank project with issue tracking, a backlog and sprints |
| Where to find it | Projects page > Create Project, or the New button in the top bar > Project |
| Who can create | Workspace Owners and Admins |
| Plan | Any plan. The Free plan allows up to 3 projects |
Who can create a software project?
Only Owners and Admins. Members, Project Managers and Guests do not see the Create Project button. If you need a software project and you are not an Admin, ask one to create it and add you. See member access levels for how roles differ.
How to create a software project
- Go to the Projects page and click Create Project. You can also use the New button in the top navigation bar and choose Project, or use Create Project on the Home page.
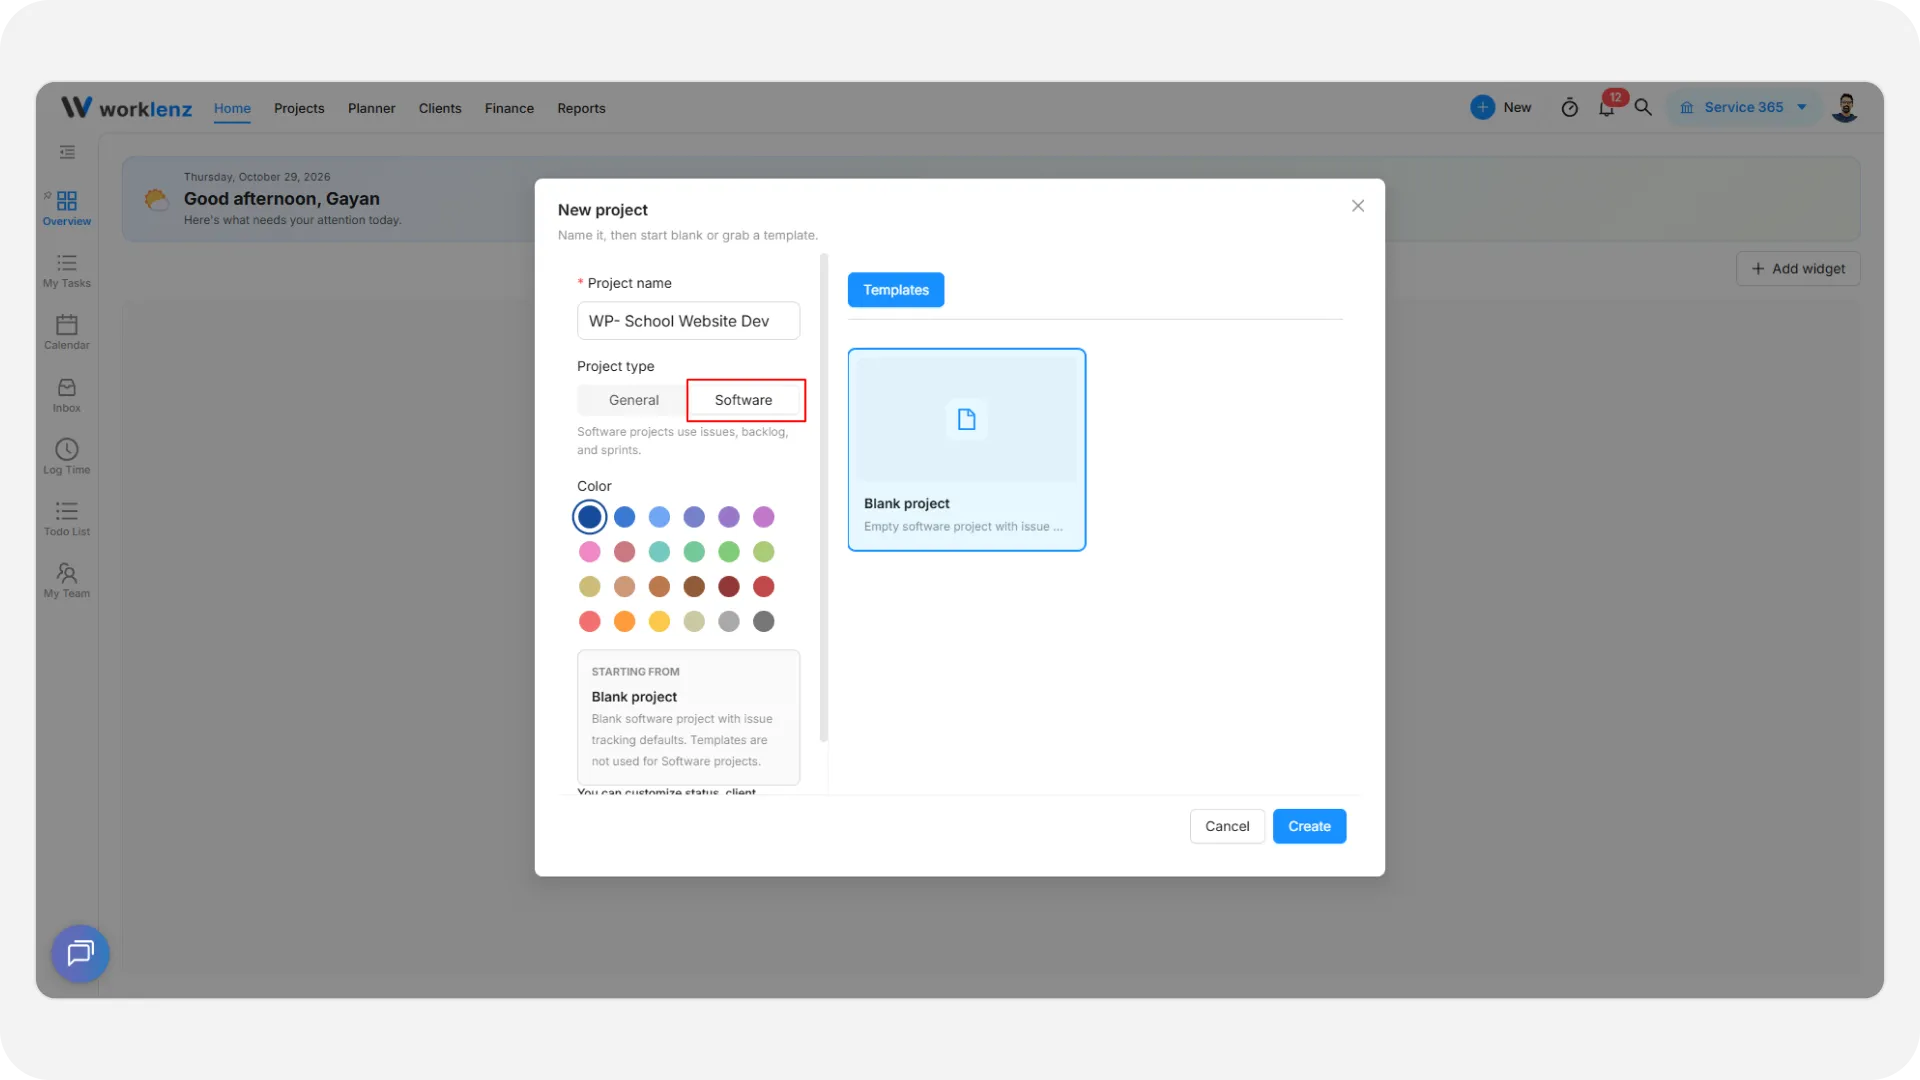
- In the New project window, enter the project name.
- Set Project type to Software. The hint “Software projects use issues, backlog, and sprints.” appears.
- Check the project key. Worklenz generates one from the name, and issue numbers are built from it, for example MOB-12. A key can use letters, numbers, hyphens and underscores, and it should be 5 characters or fewer. Longer keys are refused when you save the project settings.
- Click Create.
Why can’t I pick a template?
Software projects are always created blank. When you choose Software, the template options and the CSV import tab are hidden, and the window says “Blank software project with issue tracking defaults. Templates are not used for Software projects.” If you want a template or a CSV import, you need a general project instead. Remember you cannot switch types afterwards.
What gets created automatically?
When the project opens, you will already have:
- Software statuses: Backlog, Todo, In Progress, In Review, Done and Blocked. These replace the general To Do, Doing and Done set.
- A planned sprint named Sprint 1, with no dates yet. See sprints to name it, date it and start it.
- The Backlog tab as the landing page. The tab strip shows Backlog, Board, Releases and Reports, with List, Roadmap, Insights, Files, Members and Updates under More.
- You as a project member with admin rights on the project.
The sprint label is fixed as “Sprint” and the work items are called issues throughout the project.
What should I do after creating the project?
- Review the settings. Click the gear icon in the project header to open project settings, where you can adjust the key, description and team access. See software project settings.
- Add your team. Invite people from the Members tab under More. See manage project members.
- Add your first issues. Create them from the backlog; the steps are in backlog and issues.
- Choose a point scale if the default does not suit your team. See story points and estimation.
- Name Sprint 1 and set its dates, then start it when you are ready.
What if the project isn’t created?
- If you see “Enter a project name to continue.”, the name field is empty.
- If a message says the Free plan cannot have more than 3 projects, you have reached the Free plan limit of 3 projects. Archive or delete a project you no longer need, or upgrade your plan.
- If you see “Failed to create project. Please try again.”, wait a moment and retry.
Best practices
- Check Project type before you click Create, because the type cannot be changed afterwards.
- Keep the project key to 5 characters or fewer, because every issue number is built from it and longer keys are refused when you save the project settings.
- Name and date Sprint 1 straight after creating the project, because it is created with no dates and a sprint cannot start without both.
- Do not plan around templates or CSV import, because software projects are always created blank.