

Add Your Own Team Members to the Client Portal
If you are a Client Admin, you can bring your own colleagues into the Client Portal yourself, without asking your project contact to add each one. This keeps everyone who needs to see project updates, approve requests or follow discussions in one place.
At a glance
| What it is | Inviting colleagues from your own organization into the Client Portal |
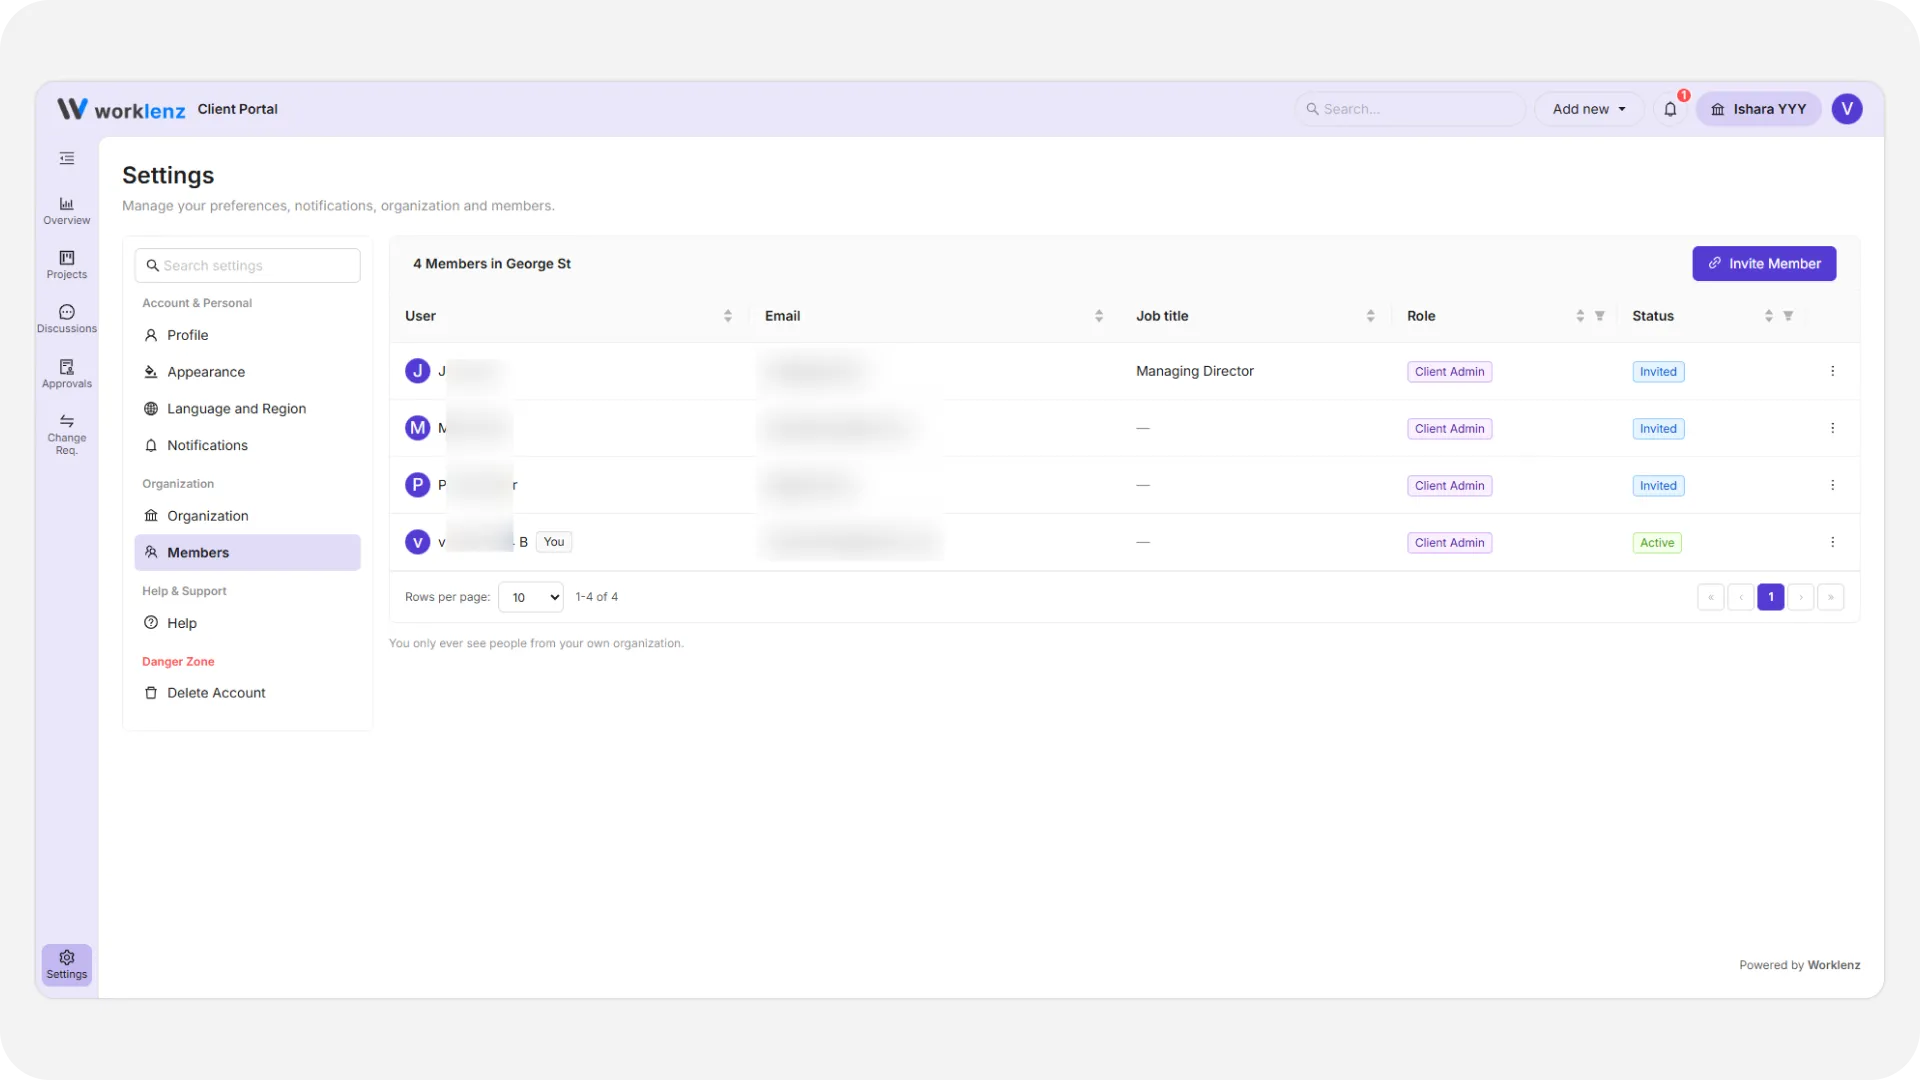
| Where to find it | Settings > Members > Invite Member |
| Who can use it | Client Admins, only when your project team has turned this on |
| Plan | Pro and Business |
Before you start
Invite Member only appears if your project team turned on Let Client Admins invite users in their portal settings. If it is off, you will see a note asking you to contact your project contact instead. The same applies to removing a colleague, controlled separately by Let Client Admins remove users.
How do I invite a colleague?
- Open Settings > Members.
- Select Invite Member.
- Enter one email address, or several separated by commas, spaces or new lines.
- Choose how to send it:
- Send email invite emails each address an invitation. Several addresses can only be invited this way.
- Copy invite link works for a single address only, and copies the link to your clipboard so you can share it yourself.
- Select Done once you see the result.
A bad or already-registered address never blocks the others in a batch. Each one is reported separately: emailed, invited but the email failed to send, or rejected with a reason.
What happens after someone is invited?
New colleagues start as a Client Viewer with no projects. They confirm their email address with a one-time code when they accept the invite. From Settings > Members, a Client Admin can then:
- Change role to Client Admin, Client Member or Client Viewer.
- Assign project so they can see specific shared projects. Client Admins already see every project, so this option only shows for Members and Viewers.
- Resend invitation by email, or Copy invite link again, while the person is still in Invited status.
Managing people after they join
Once someone is active, the same Members list lets a Client Admin edit their name and job title, change their role, or remove them if removal is turned on. You cannot change your own role or remove yourself, and your organization’s last Client Admin is locked in place so the portal is never left without one.
Example
Your Finance Manager needs to see quotes and invoices but should not approve project changes. Open Settings > Members, select Invite Member, enter their email and choose Send email invite. Once they accept, change their role to Client Member and assign the relevant project so they can see it.
Best practices
- Invite colleagues by email when adding more than one person at once, because a copied link only works for a single address.
- Assign a role and projects as soon as someone accepts, because they start as a Client Viewer with no projects.
- Keep at least two Client Admins in your organization, because the last one is locked in place and cannot be removed or demoted.
- Ask your project contact to turn on invite and remove permissions if you do not see Invite Member, since both are off by default until your project team enables them.