

Project files
Project files let you upload files directly to a project without linking them to a specific task. This is useful for storing project-level documents, references, or shared resources.
How to upload a project file
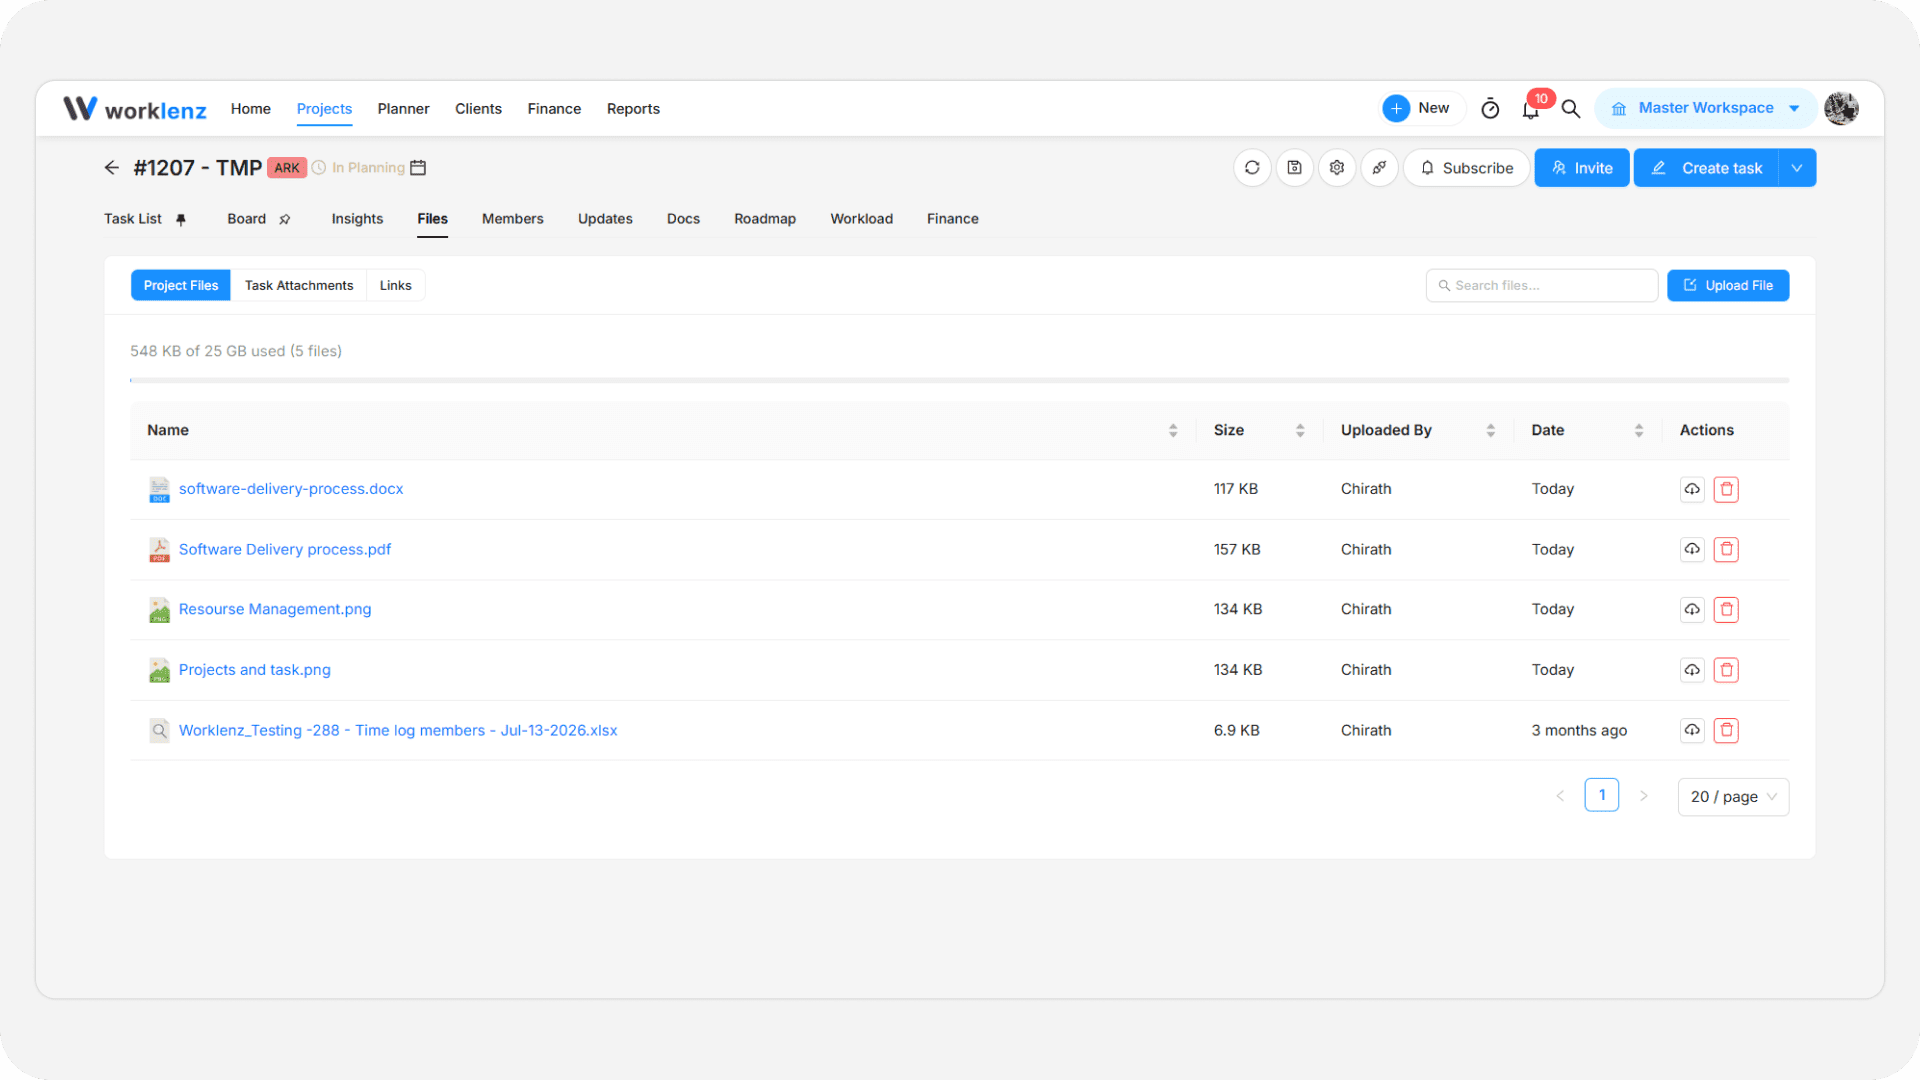
- Open the project and go to the Files tab.
- Make sure the Project sub-tab is selected.
- Click the Upload button on the right-hand side, or drag and drop files directly into the upload area.
- Select the files you want to upload and confirm.
Supported file types
Common image, document, and archive formats are supported. Executable and script files (such as .exe, .bat, .msi, .dll, .sh, .ps1, .js, and .jar) are blocked for security reasons.
File list details
The project files section displays the following details for each file, sorted by upload date (newest first):
- Name: The filename and file type icon. Click to preview the file.
- Size: The file size.
- Uploaded By: The team member who uploaded the file.
- Date: The upload date.
Use the search box to quickly find a file by name. Workspace owners and admins also see a storage usage indicator showing how much of the plan’s storage has been used.
You can preview a file by clicking on its file name. You can also Download or Delete files directly from this section.